
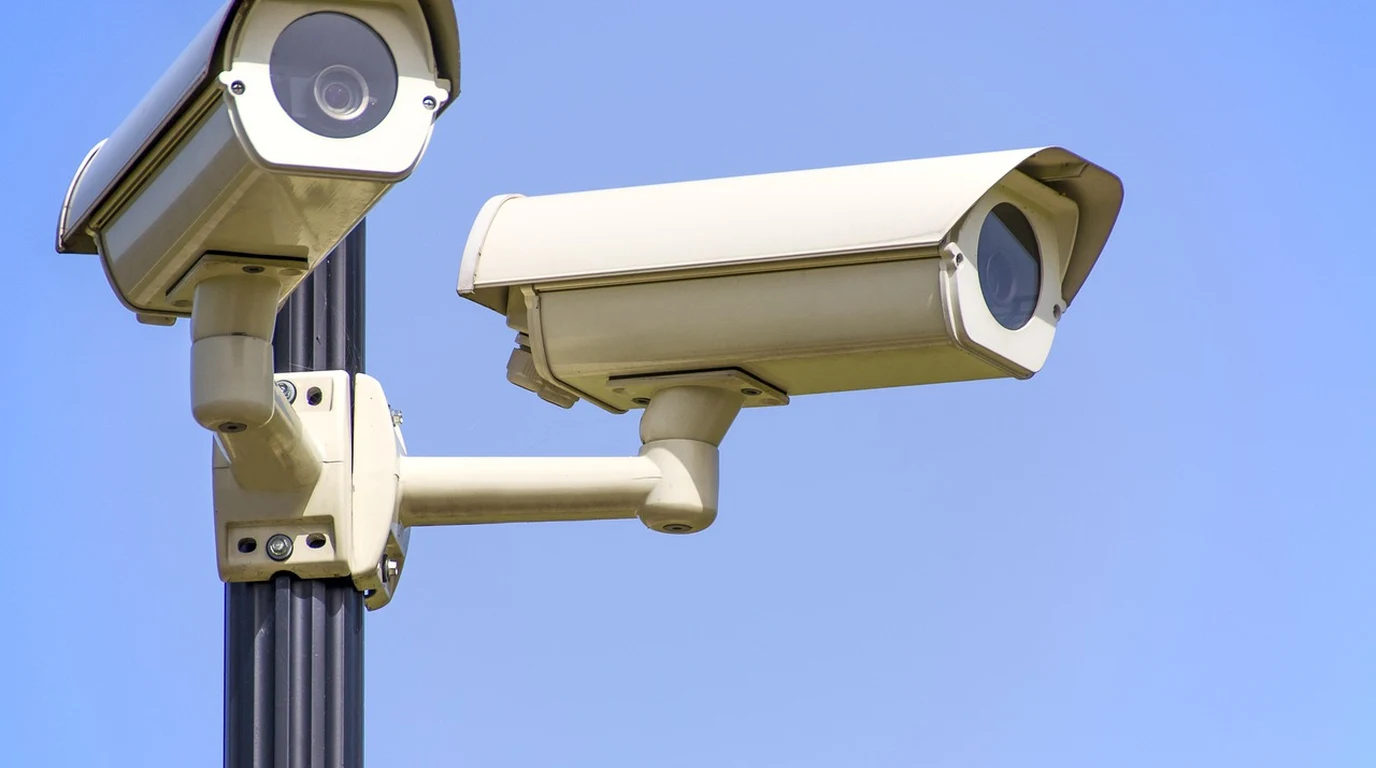
You’ve invested in a robust Frigate NVR setup, meticulously tuned your object detection, and perhaps even automated some basic lighting based on person detection. It’s a powerful foundation. But then, the thought crosses your mind: “What if my smart home could recognize which car just pulled into the driveway? What if the garage door opened automatically, but only for my family’s vehicles, not just any car?” The promise of Automatic License Plate Recognition (ALPR) in Frigate NVR feels like the next logical leap, a true upgrade to your home’s intelligence and security.
Yet, as you start digging, you quickly hit a wall of conflicting information, vague hardware recommendations, and the disheartening reality that your existing, otherwise excellent, security cameras simply aren’t cutting it. You’ve probably seen blurry plates, washed-out reflections from headlights, or simply no detection at all. The frustration is palpable: you know the technology exists, but making it work reliably, consistently, and locally within your Frigate ecosystem feels like deciphering an ancient, forgotten language. You’re not just looking for a novelty; you’re seeking a production-grade solution that enhances security, streamlines access, and provides undeniable peace of mind.
Beyond the camera, the choice of ALPR inference backend is another crucial nuance. Many services offer cloud-based ALPR APIs (like Platerecognizer.com). While convenient for quick tests, relying on external services introduces latency, privacy concerns (your plate data leaves your network), and ongoing subscription costs. For a production-grade, privacy-centric Frigate setup, local inference is the gold standard. This means running the ALPR engine on your own hardware, ideally leveraging a GPU for speed.
CodeProject.AI is an excellent, user-friendly option that bundles various AI models, including ALPR, into a single Docker container. It’s relatively easy to set up and integrates well with Frigate’s `detectors` configuration. For maximum performance and flexibility, especially if you have a powerful GPU, exploring open-source solutions like FastALPR or PaddleOCR directly on your host system offers unparalleled control and speed, though with a steeper learning curve. The trap here is underestimating the computational demands of real-time ALPR and choosing a backend that can’t keep up, leading to missed detections or significant delays.
Direct Practical Verdict:
Achieving reliable Automatic License Plate Recognition in Frigate NVR demands dedicated LPR cameras with precise optical tuning (fast shutter, telephoto lens, 850nm IR) and a robust local inference backend like CodeProject.AI or FastALPR. Standard security cameras fail catastrophically. With the right hardware and meticulous configuration, seamless Home Assistant automation for trusted vehicle access is entirely within reach.
Why Your Existing Security Cameras Fail Catastrophically at License Plate Recognition
Let’s be honest: you’ve probably tried pointing one of your existing 4K security cameras at your driveway, hoping for a miracle. You’ve squinted at the footage, zoomed in, and come away disappointed. The numbers are unreadable, the letters are a blur, or the entire plate is a blinding white rectangle. This isn’t a limitation of Frigate or the ALPR software; it’s a fundamental optical and physics problem that 80% of practitioners overlook. The “costly trap” here is assuming that “more megapixels” or “better low-light performance” translates directly to effective license plate capture. It absolutely does not. Standard security cameras are designed for general surveillance: wide fields of view, automatic exposure, and often a rolling shutter sensor. These features are antithetical to reliable ALPR. Here’s the real kicker: * Rolling Shutter Motion Blur: Most consumer-grade IP cameras use rolling shutter sensors. When a vehicle is moving, even slowly, the sensor scans the image line by line. This causes a “jello” effect or significant blur on fast-moving objects, rendering license plates illegible. A global shutter sensor would solve this, but they’re rare and expensive in this segment. The practical solution? An extremely fast shutter speed. * Headlight Glare and Reflective Plates: License plates are designed to be reflective, especially at night, to be visible to other drivers and law enforcement. This reflectivity, combined with powerful headlights or even ambient streetlights, causes severe overexposure and washout on standard cameras with automatic exposure. The plate becomes a bright, featureless blob. * Incorrect Focal Length and Field of View: Your typical security camera has a wide-angle lens (e.g., 2.8mm to 4mm) to cover a broad area. While great for general surveillance, this means a license plate, even at a moderate distance, occupies very few pixels. ALPR algorithms need sufficient pixel density to accurately read characters. You need a tight, telephoto view. * Ineffective IR Illumination: Many cameras use broad-spectrum IR that washes out reflective plates. Dedicated LPR cameras often use specific 850nm IR illuminators that are powerful and focused, designed to “cut through” glare and illuminate the plate evenly without overexposing it. This isn’t about buying the most expensive camera; it’s about buying the right camera for the specific task of ALPR. Trying to force a general-purpose camera into this role is like trying to hammer a nail with a screwdriver – you might eventually get it in, but it’ll be frustrating, inefficient, and ultimately ineffective.| Feature | Standard Security Camera (General Surveillance) | Dedicated LPR Camera (Specialized for ALPR) | Impact on ALPR Performance |
|---|---|---|---|
| Shutter Speed | Automatic, often slow (1/30s to 1/250s) in low light. | Manually locked fast (1/500s to 1/2000s). | Critical: Fast shutter eliminates motion blur from moving vehicles, making characters legible. |
| Lens Type & Focal Length | Wide-angle (2.8mm-4mm), fixed or limited varifocal. | Telephoto varifocal (12mm-50mm), often motorized. | Critical: Telephoto zoom ensures sufficient pixel density on the plate for accurate OCR, minimizing distortion. |
| IR Illumination | Built-in, broad-spectrum, often overpowers reflective plates. | High-power 850nm IR illuminators, often external or specialized. | Critical: 850nm IR cuts through glare, providing even illumination without washing out reflective plates. |
| Exposure Control | Automatic Gain Control (AGC), Wide Dynamic Range (WDR). | Manual exposure, Backlight Compensation (BLC) for plate region. | Important: Manual control prevents overexposure from headlights and reflective surfaces. |
| Cost & Complexity | Lower initial cost, simpler setup for general use. | Higher initial cost, more complex optical tuning required. | Trade-off: Investment in specialized hardware yields reliable ALPR; general cameras yield frustration. |
Your Actionable Playbook: Deploying Production-Grade ALPR in Frigate NVR
This isn’t about theoretical possibilities; it’s about getting ALPR working reliably in your home today. Here’s the step-by-step playbook, from hardware selection to Home Assistant automation.Step 1: The Optical Foundation – Selecting and Configuring Your LPR Camera
This is where most setups fail. Get this wrong, and no software wizardry will save you. 1.1. Choosing the Right LPR Camera: Forget your existing cameras for this specific task. You need a dedicated LPR camera. Look for models explicitly marketed as “LPR” or “ANPR” cameras. Reputable brands like Hikvision, Dahua, or specialized LPR manufacturers offer suitable options. * Key Features to Look For: * Varifocal Lens: Crucial. Aim for a range like 12mm-50mm. This allows you to precisely zoom in to ensure the license plate occupies a significant portion of the image (at least 100-150 pixels wide for reliable OCR). * Fast Shutter Speed Control: Must be manually configurable to at least 1/500s, ideally up to 1/2000s. * High-Power 850nm IR Illuminator: Either built-in and effective, or plan for an external 850nm IR floodlight. Avoid cameras with visible white light illuminators for LPR. * Backlight Compensation (BLC) / Highlight Compensation (HLC): These features help prevent overexposure from headlights. * Resolution: 1080p (2MP) is often sufficient, but 4MP can provide a bit more detail for longer distances. More megapixels don’t compensate for poor optical settings. 1.2. Strategic Mounting and Aiming: Placement is paramount. * Mounting Height: Ideally 3-6 feet (1-2 meters) above the ground. Too high, and the angle becomes too steep, distorting the plate. * Angle of Incidence: This is critical. The camera should be aimed as straight-on as possible to the expected path of the vehicle. An angle greater than 30 degrees horizontally or vertically will significantly degrade accuracy. Imagine a vehicle stopping at a gate or a specific point in your driveway; aim for that spot. * Distance: Determine the optimal distance based on your lens. With a 12-50mm lens, you’re typically looking at effective ranges of 15-60 feet (5-20 meters). Zoom in until the plate fills a good portion of the horizontal frame when a vehicle is at the detection point. * Minimize Obstructions: Ensure no trees, poles, or other objects block the view of the license plate. 1.3. Optical Configuration Cheat Sheet (In Camera Web UI): Access your camera’s web interface and apply these settings. * Shutter Speed: Manually set to 1/500s. Test and increase to 1/1000s or 1/2000s if motion blur persists, especially at night. * Gain/ISO: Keep this as low as possible. High gain introduces noise, which degrades OCR accuracy. * Exposure Mode: Manual or Shutter Priority. Avoid full auto. * IR Mode: Enable 850nm IR. Adjust IR intensity if available to prevent overexposure. * Day/Night Switch: Force to Night mode if you’re using dedicated 850nm IR and want consistent monochrome images for ALPR. This avoids color shifts and potential issues. * WDR/HDR: Disable. These features can introduce artifacts that confuse ALPR algorithms. * Noise Reduction (DNR): Disable or set to low. Aggressive DNR can smooth out plate characters. * Image Settings: Sharpening to medium, contrast to medium. Avoid excessive digital zoom. * Stream Resolution: Use a secondary stream (substream) at 720p or 1080p for ALPR processing if your primary stream is 4K. This reduces the load on your ALPR backend. Frigate can handle multiple streams from the same camera.Step 2: Integrating ALPR Backend with Frigate NVR
Now that your camera is optically tuned, let’s get Frigate to talk to an ALPR engine. We’ll focus on CodeProject.AI as it’s generally the easiest to set up with Frigate. 2.1. Setting up CodeProject.AI (Docker): CodeProject.AI provides a convenient Docker container. * Prerequisites: Docker and Docker Compose installed on your Frigate host or a separate machine. * `docker-compose.yml` for CodeProject.AI: “`yaml version: “3.9” services: codeproject-ai: container_name: codeproject-ai image: codeproeproject/ai-explorer:latest restart: unless-stopped ports: – “5000:5000” # Web UI and API – “5001:5001” # HTTPS (optional) environment: – TZ=America/New_York # Adjust to your timezone volumes: – /path/to/your/codeprojectai/data:/app/data # Persistent data # If you have a GPU, uncomment these lines and adjust for your setup: # deploy: # resources: # reservations: # devices: # – driver: nvidia # count: all # capabilities: [gpu] “` Replace `/path/to/your/codeprojectai/data` with a persistent volume path on your host. If you have an NVIDIA GPU, uncomment the `deploy` section and ensure your NVIDIA Container Toolkit is installed. * Start the container: `docker-compose up -d` * Access UI: Navigate to `http://your-host-ip:5000`. In the UI, go to “Modules” and ensure “License Plate Recognizer” is enabled. 2.2. Configuring Frigate’s `config.yml` for ALPR: You’ll add a new `detector` and configure your LPR camera to use it. “`yaml… other Frigate configuration …
mqtt: host: your_mqtt_broker_ip user: mqtt_user password: mqtt_password detectors: # Your primary object detector (e.g., for CPU or Coral) coral: type: edgetpu device: pci:0 # or usb:0 # New detector for CodeProject.AI ALPR codeproject_alpr: type: custom # The URL for CodeProject.AI’s ALPR endpoint # Check CodeProject.AI UI -> Modules -> License Plate Recognizer -> API URL # It’s usually http://codeproject-ai:5000/v1/image/alpr # If CodeProject.AI is on the same host, use localhost or the container name if in same Docker network url: http://codeproject-ai:5000/v1/image/alpr # Optional: If you want to pass specific parameters to the ALPR engine # For CodeProject.AI, you might specify minimum confidence or regions # parameters: # min_confidence: 0.7 # region: “us-wa” # Example for Washington state timeout: 30 # Increase if you see timeouts, especially on slower hardware cameras: driveway_lpr: ffmpeg: inputs: – path: rtsp://your_lpr_camera_ip/stream_path # Use the LPR camera’s substream for ALPR roles: – detect – rtmp # Or restream if you want to view it in Frigate UI detect: enabled: True # Specify the ALPR detector here detector: codeproject_alpr # Only detect ‘license_plate’ objects objects: track: – license_plate # Define a specific zone for ALPR processing to reduce false positives and load zones: alpr_zone: coordinates: – 0,400 # Top-left X,Y – 1920,400 # Top-right X,Y – 1920,1080 # Bottom-right X,Y – 0,1080 # Bottom-left X,Y objects: – license_plate detector: codeproject_alpr # Ensure this zone uses the ALPR detector # Optional: Set a specific refresh rate for ALPR processing within the zone # This prevents constant re-processing of the same plate # refresh_interval: 5 # seconds # Optional: If you want to use your primary object detector for other objects on this camera # objects: # track: # – person # – car # detector: coral # Use your main detector for these # filters: # car: # min_area: 5000 # max_area: 100000 # person: # min_area: 2000 # max_area: 50000 “` Explanation: * We define `codeproject_alpr` as a `custom` detector pointing to the CodeProject.AI API endpoint. * Under your `driveway_lpr` camera, we explicitly set `detector: codeproject_alpr` and `objects: track: [license_plate]`. * Crucially, define a `zone` specifically for `license_plate` detection. This tells Frigate to only send frames containing potential license plates within that defined area to the ALPR backend, significantly reducing processing load and improving efficiency. The coordinates should encompass where a license plate would appear in your camera’s view. 2.3. (Advanced) Local FastALPR/PaddleOCR: If CodeProject.AI isn’t performing adequately or you want to squeeze every bit of performance from your GPU, you can integrate a standalone ALPR engine. This typically involves: * Installing: FastALPR or PaddleOCR (with GPU support) directly on your host or in a dedicated container. * Creating a Wrapper Script: Write a small Python script that takes an image path, calls the ALPR engine, and returns JSON output compatible with Frigate’s custom detector. * Frigate Configuration: Point Frigate’s `custom` detector to this script. This is significantly more complex and requires strong Linux/Python skills. For most users, CodeProject.AI is the pragmatic choice.Step 3: Home Assistant Integration – The Smart Automation Layer
With Frigate now detecting license plates, the next step is to leverage this data in Home Assistant for intelligent automation. 3.1. Listening for Frigate’s MQTT Messages: Frigate publishes detected license plates to MQTT. The topic will typically look like `frigate/events`. * Create an MQTT Sensor in Home Assistant: Add this to your `configuration.yaml` or a dedicated `mqtt.yaml` file: “`yaml mqtt: sensor: – name: “Frigate ALPR Plate” state_topic: “frigate/events” value_template: > {% if value_json.type == ‘end’ and value_json.after.label == ‘license_plate’ %} {% set plate_data = value_json.after.plate %} {% if plate_data %} {{ plate_data.plate }} {% else %} unknown {% endif %} {% else %} unknown {% endif %} json_attributes_topic: “frigate/events” json_attributes_template: > {% if value_json.type == ‘end’ and value_json.after.label == ‘license_plate’ %} {% set plate_data = value_json.after.plate %} {% if plate_data %} {{ { ‘confidence’: plate_data.confidence, ‘region’: plate_data.region, ‘box’: plate_data.box, ‘camera’: value_json.after.camera, ‘id’: value_json.after.id, ‘start_time’: value_json.after.start_time, ‘end_time’: value_json.after.end_time } | tojson }} {% else %} {} {% endif %} {% else %} {} {% endif %} “` This sensor will update with the detected plate number and its attributes whenever Frigate finishes processing a `license_plate` event. 3.2. Creating a Whitelist of Approved Plates: For access control, you’ll need a way to manage approved plates. * Home Assistant Helpers: Go to `Settings > Devices & Services > Helpers`. * Create a “Text” helper for each approved plate (e.g., `input_text.approved_plate_car_1`, `input_text.approved_plate_car_2`). * Alternatively, create a single “Text” helper and store comma-separated plates, or use a “List” helper if available. For simplicity and scalability, a `template` sensor checking against a list of `input_text` helpers is often best. * Template Sensor for Whitelist Check: “`yaml template: – trigger: – platform: state entity_id: sensor.frigate_alpr_plate sensor: – name: “Is Plate Whitelisted” unique_id: is_plate_whitelisted state: > {% set detected_plate = states(‘sensor.frigate_alpr_plate’) | upper %} {% set approved_plates = [ states(‘input_text.approved_plate_car_1’) | upper, states(‘input_text.approved_plate_car_2’) | upper, # Add more input_text helpers for other approved plates ] %} {% if detected_plate != ‘UNKNOWN’ and detected_plate in approved_plates %} true {% else %} false {% endif %} “` This sensor will become `true` if the `sensor.frigate_alpr_plate` matches any of your `input_text` helpers. 3.3. Automating Garage Door / Gate Relays: Now for the exciting part – making things happen! * Example Automation (Garage Door): “`yaml automation: – alias: “Open Garage Door for Whitelisted Plate” id: “open_garage_whitelisted_plate” trigger: – platform: state entity_id: sensor.is_plate_whitelisted to: “true” # Optional: Add a ‘for’ duration to ensure the plate is consistently detected # for: # seconds: 5 condition: # Ensure the garage door is currently closed – condition: state entity_id: cover.garage_door state: “closed” # Optional: Add a cooldown to prevent rapid re-triggers – condition: template value_template: “{{ (now() – state_attr(‘automation.open_garage_door_for_whitelisted_plate’, ‘last_triggered’) | default(as_datetime(0), true)).total_seconds() | int > 300 }}” # 5 minute cooldown action: – service: cover.open_cover target: entity_id: cover.garage_door – service: persistent_notification.create data: title: “ALPR Event” message: “Whitelisted vehicle ({{ states(‘sensor.frigate_alpr_plate’) }}) detected. Opening garage door.” “` This automation triggers when a whitelisted plate is detected, checks if the garage is closed, and then opens it. The cooldown prevents it from opening repeatedly if the car lingers. * Example Automation (Driveway Gate): Similar to the garage door, but targeting your gate’s entity (e.g., `switch.driveway_gate_relay`). “`yaml automation: – alias: “Open Driveway Gate for Whitelisted Plate” id: “open_gate_whitelisted_plate” trigger: – platform: state entity_id: sensor.is_plate_whitelisted to: “true” condition: – condition: state entity_id: binary_sensor.driveway_gate_contact # Assuming a sensor for gate state state: “off” # ‘off’ for open, ‘on’ for closed, depending on your sensor – condition: template value_template: “{{ (now() – state_attr(‘automation.open_driveway_gate_for_whitelisted_plate’, ‘last_triggered’) | default(as_datetime(0), true)).total_seconds() | int > 120 }}” # 2 minute cooldown action: – service: switch.turn_on # Or whatever service opens your gate target: entity_id: switch.driveway_gate_relay – delay: seconds: 10 # Keep gate open for 10 seconds – service: switch.turn_off # Close the gate (if it’s a momentary switch) target: entity_id: switch.driveway_gate_relay – service: persistent_notification.create data: title: “ALPR Event” message: “Whitelisted vehicle ({{ states(‘
Optical License Plate Recognition & Shutter Control
Deploying long-range thermal perimeter detection works hand-in-hand with high-speed optical cameras tuned for identification. For Frigate NVR ALPR setups, review Thermal Security Cameras: Perimeter Intrusion Test.